Notes:
- You will need the full server + printer name (smb://wpvapppcpha01.boilerad.purdue.edu/RHPHroom#-Tag#-Type (HP/HPColor/Toshiba)).
- You may need to install drivers for your printer.
- HP Drivers need to be installed using the HP Easy Admin app. A copy of this app can be located by navigated to this Shared drive folder S:\all\PUBLIC\MAC Printer Software
- Once downloaded from the Shared drive, follow these instructions to install the printer https://support.hp.com/us-en/document/c06164609
- Toshiba drivers can be found here: https://business.toshiba.com/support/
- You will need to know the features of your printer and configure them during set up for full printer functionality.
- Your department may use page accounting, requiring additional information for setup.
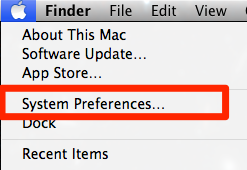
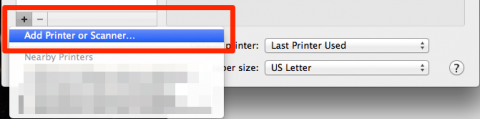
- Click on the Apple menu and click on System Preferences
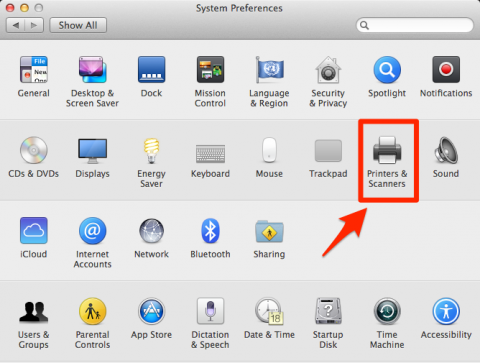
Open Printers & Scanners
Click the plus sign button ('+'), in the lower left corner
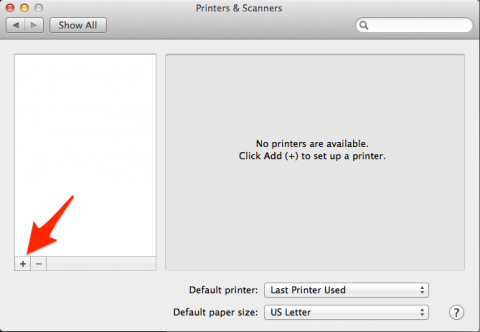
Select "Add printer or scanner"
Once in the Add window, you will need to customize your toolbar (If not already present) to add the "Advanced" icon.
If the Advanced button is already present, skip this step
Right-click the empty space next to the "Windows" icon and select "Customize Toolbar"
Add an "Advanced" gear to the toolbar menu by selecting the "Customize Toolbar" option:
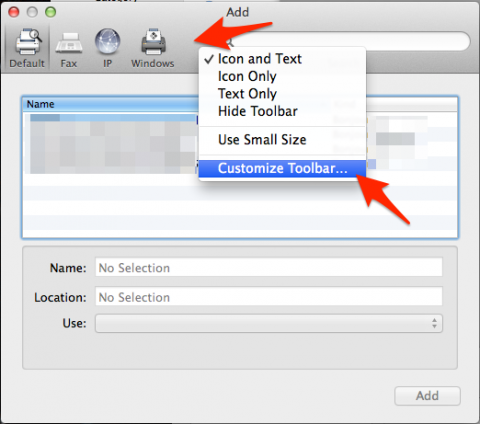
Click and drag the "Advanced" (gear) icon to the empty space on the toolbar. Click "Done" when finished.
(Again, if not already present)

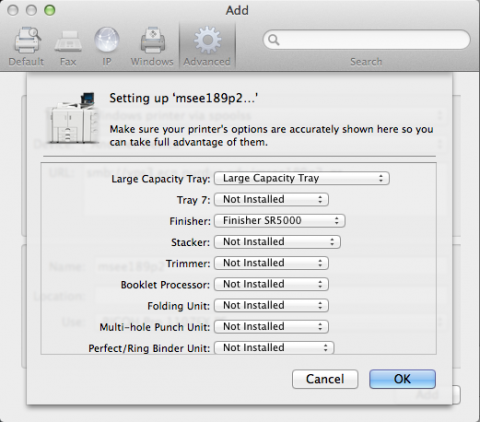
Click the "Advanced" icon. Wait a few moments until "Searching for printers" finishes.
Choose "Windows printer via spoolss" for the "Type" drop-down menu.
Enter the URL field as specified by your COP support staff.
(smb://wpvapppcpha01.boilerad.purdue.edu/RHPHroom#-Tag#-Type (HP/HPColor/Toshiba))
Name and Location are to be filled in as you need, as the content does not impact printing.
For the use drop-down, choose "Select software". In the pop-up window, use the filter/search in the upper
right corner to search for your printer model (provided by user & desktop support).
Select the proper driver for your printer in the list and click OK.
Click the Add button in the lower right.
Choose all the appropriate installed printer options form the drop-down menus (provided by user & desktop support).
Click OK.
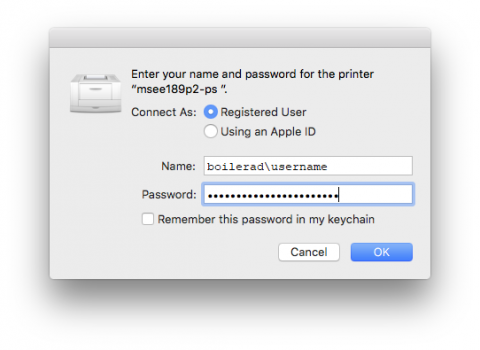
On your first print job, you will be prompted for credentials. Use "boilerad\username" for the
username field along with your career account password in the password field.
If you check "Remember this password in my Keychain", Please see the next step for assistance when you change your password for important information.
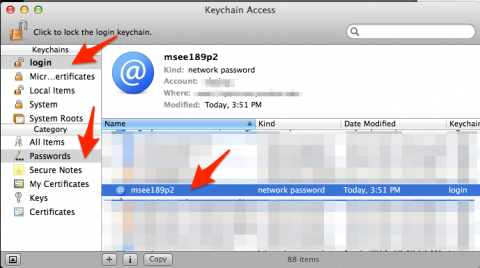
If you save your password, you will need to clear that password out each
time you change your Purdue career account password. To do so, open
Keychain Access (Applications > Utilities). Select "login" under
"Keychains" and "Passwords" under "Category", both in the left-hand
column. Look through the list to the right for the printer name.
Right-click on the item and select "Delete". You will now be prompted
for new credentials the next time you print.